Patient Outcome
Restoring a Fractured Tooth with a Natural, Seamless Implant
Years earlier, trauma led to a root canal. Over time, the tooth had discolored, though it remained functional.
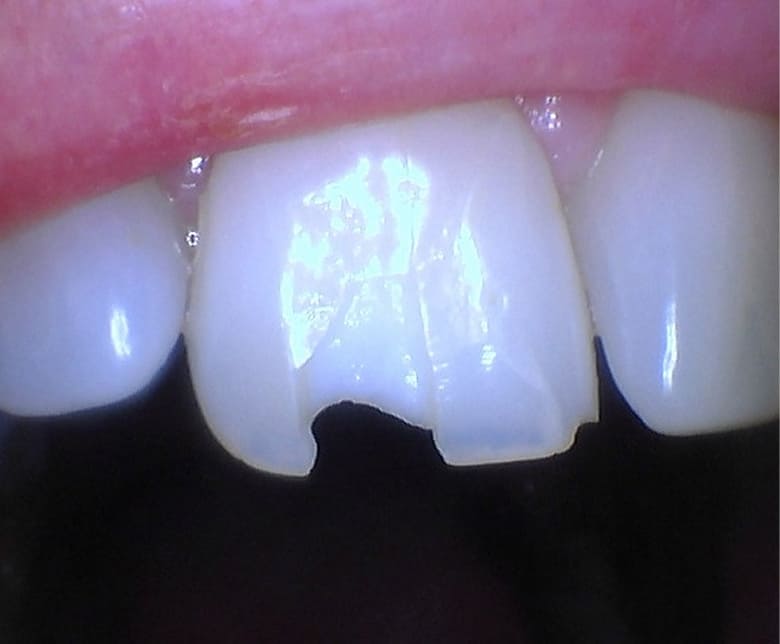
Before
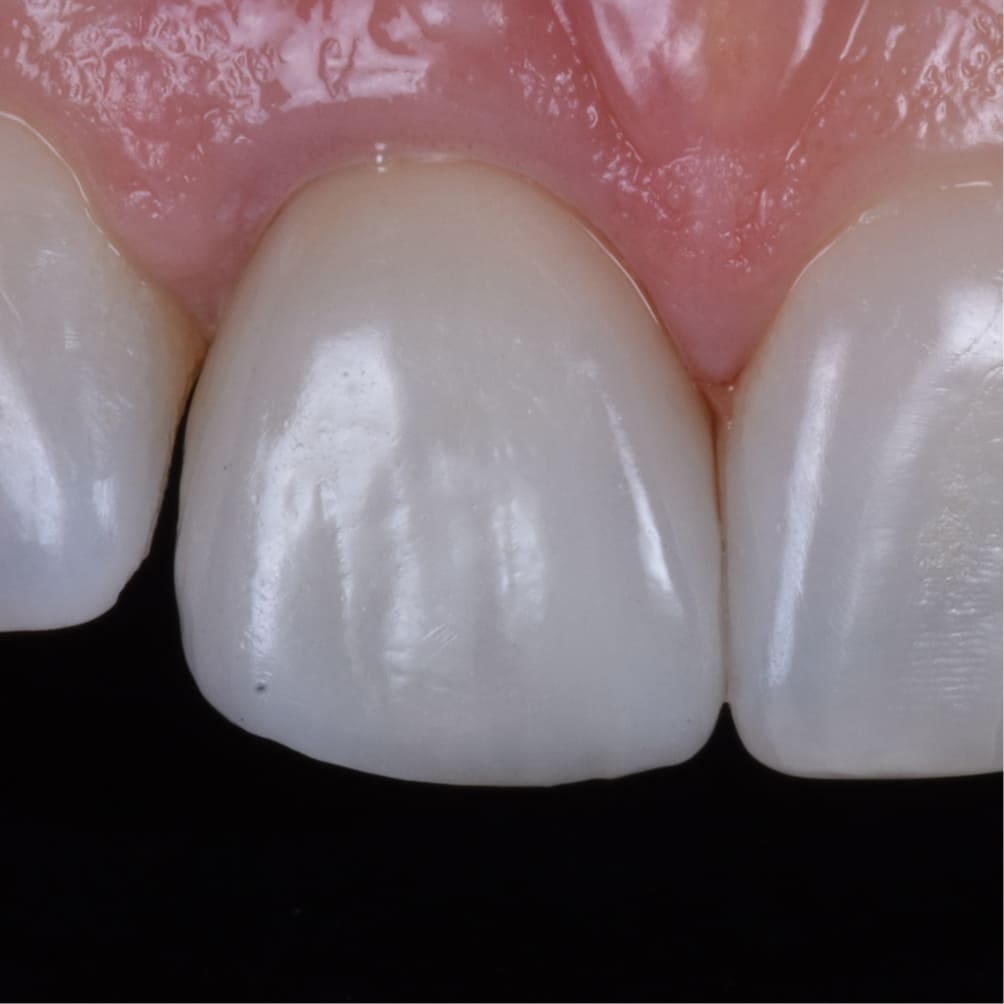
After
Patient
Marianne
Surgeon
Dr. Peter Nordland
Recovery
5-6 months
"That tooth had always made me self-conscious because of how dark it looked compared to the others. Now when I look in the mirror, I cannot tell which tooth is the implant. It just looks like my own tooth."
Twenty years before her consultation, Marianne had fractured her upper right central incisor in a bicycle accident. The tooth was saved with a root canal and post-and-core restoration at the time, and it served her well through two decades of normal use.
Then, during an ordinary meal, the tooth fractured at the root level. Her dentist confirmed it was beyond saving and referred her for extraction and implant replacement. Marianne, a teacher who stood in front of a classroom every day, had two priorities: the most natural-looking result possible, and no period of time without a tooth where everyone could see it.
Initial Condition & Fracture Assessment
Marianne presented with a vertical root fracture of the upper right central incisor. The fracture extended below the gingival margin into the root, confirmed by clinical probing and periapical radiography. The tooth was slightly mobile and tender to palpation.
The surrounding bone and soft tissue were still in reasonable condition. The tooth had functioned without infection for years before the fracture, which helped preserve the local anatomy. A mild thinning of the buccal bone plate was noted, but it was manageable with the right surgical approach.
Marianne's concerns were clear: she wanted a result that would blend seamlessly with her adjacent teeth, and she needed a solution that avoided any visible gap during treatment.
Challenges in Anterior Single-Tooth Replacement
Replacing a single front tooth with an implant is one of the most technically demanding situations in implant dentistry, because the result is on full display and must match every visible quality of the natural tooth beside it.
- The buccal bone in the anterior maxilla is thin and prone to resorption after extraction — resorption that directly affects the tissue profile if not managed at the time of surgery.
- The gingival margin position and the papilla height between the implant and adjacent teeth must replicate the natural tissue architecture precisely.
- Any mismatch in crown shade, translucency, or surface texture is immediately apparent in the smile zone.
Treatment Plan & Approach
The plan called for immediate implant placement at the time of extraction, with simultaneous bone grafting of the buccal plate to offset the expected resorption and maintain facial tissue contour.
An immediate provisional crown would be placed at the time of surgery, giving Marianne a tooth in place throughout healing and allowing the soft tissue to form around the implant at the right contour before the final crown was made.
The final restoration would use a custom ceramic abutment and a pressed ceramic crown — materials chosen specifically for their natural optical properties in the esthetic zone.
Procedure & Healing
The fractured root was removed atraumatically using periotomes and piezoelectric instruments designed to protect the delicate buccal bone and surrounding tissue. The socket was thoroughly debrided and evaluated before proceeding.
A tapered implant was placed in the optimal three-dimensional position, engaging the palatal bone wall to achieve primary stability. Particulate bone graft was packed into the gap between the implant surface and the buccal plate, and a collagen membrane was placed to protect the graft.
A provisional crown was fabricated and connected to the implant the same day at a reduced occlusal load to protect the healing site. Marianne left with a natural-appearing tooth in place.
Healing proceeded without complication. By five months, the implant showed excellent integration, and the soft tissue had matured around the provisional with the papilla fill and margin position needed for the final crown.
Outcome
The final crown was delivered at five and a half months. A custom-milled zirconia abutment supported a pressed lithium disilicate crown that was shade-matched and surface-characterized to blend with the adjacent central incisor.
The result was complete. The crown matched the neighboring tooth in shade, translucency, surface texture, and margin position. The papillae filled naturally, and there was no visible boundary between the implant crown and the surrounding natural dentition.
Marianne had lived with a discolored tooth for nearly two decades and had expected the implant to look artificial. She was emotional at the delivery appointment. She could not tell which tooth was the implant — and neither could anyone else.
Clinical Notes
This case demonstrates the value of immediate implant placement with simultaneous bone grafting in the esthetic zone. By placing the implant at the time of extraction and augmenting the buccal plate, the soft tissue profile was preserved through the transition from natural tooth to implant restoration.
The use of an immediate provisional crown was critical for shaping the peri-implant soft tissue during healing. The provisional acted as a scaffold that guided tissue maturation, producing the natural emergence profile that made the final crown look lifelike.
- Atraumatic extraction with piezoelectric instruments preserved the thin buccal bone plate, which is essential for maintaining facial gingival contour.
- Immediate provisionalization prevented soft tissue collapse and maintained the papillae during the integration period.
- A custom zirconia abutment provided a natural tissue-colored subgingival profile, avoiding the gray shadow that can occur with titanium abutments in thin tissue.
Your Story Starts Here
Ready to See What's Possible?
Request a consultation and let our specialists evaluate your situation. Clear options, honest answers, no pressure.